There are two ways to enter functions into the Indicator Editor. You can type them in the Indicator Editor in the traditional manner, or you can double-click them in the Designer Functions dialog box, and they will appear wherever the cursor is in the Indicator Editor with helpful default values that you can change.
If you check the Use Designer Dialogs check box, whenever you type in or double-click a function, dialog boxes designed for each indicator will appear.
For example, the Bollinger Bands function definition looks like this:
bollb(Num Bars, Num Devs, Area, Num Bars Ago) Area = u (Upper Band), m (Middle Band), l (Lower Band)
An example:
bollb(20, 2.00, u)
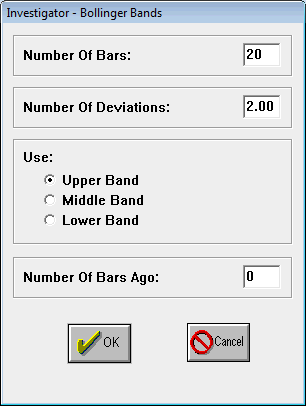
(Please note the lack of the Num Bars Ago parameter, indicating the current bar.) Even for a seasoned expert, memorizing what parameter is what, and which values each parameter can contain can be daunting. The Functions dialog with its descriptions help, but there is an easier way. If you have the Use Designer Dialog check box checked, when you type in “bollb” or double click bollb in the Functions dialog box, this dialog box will appear:

When you click OK, the formula will be entered correctly in the Designer dialog box editor. If at any point you want to change any of the parameters, you simply double-click on the formula name in the editor, and the dialog box will pop up again. You now don't have to memorize anything with these easily understandable dialogs.